
|
|
|
|
|
|
Navigation |
|
>> Home |
Uploading Files with ASP.NET
Written by: Christoph Wille Something that could not reasonably be done under ASP without a third party component was the uploading of files to the web server even though the uses of this feature range from content management systems to online cost estimates for translations (based on the content of uploaded files). Of course, these are only two of many uses .
As mentioned, under ASP third party components are necessary to be able to receive
files on the web server. ASP.NET offers this functionality by means of a HTML Control
called HtmlInputFile which roughly speaking only differs from the known
In this article, I will present two applications of file uploads:
The first approach is the simplest solution, the second demonstrates a very flexible concept for receiving the data yourself and processing them. The use of the source code in this article requires the Microsoft .NET Framework SDK installed on a Webserver. I also presume that the reader is familiar to some degree with the C# programming language. Upload into a fileTake a look at the following screenshot - similar examples should already be familiar from file uploads under ASP: 
Even though it looks not much different from the 'outside', 'under the hood' things very different from what we know from ASP happen . For this, we will now take a closer look at the source code (uploadNsave.aspx):
<% @Page Language="C#" %>
<html>
<head>
  <title>File upload in ASP.NET</title>
</head>
<body bgcolor="#ffffff" style="font:8pt verdana;">
<script language="C#" runat="server">
void btnUploadTheFile_Click(object Source, EventArgs evArgs)
{
  string strFileNameOnServer = txtServername.Value;
  string strBaseLocation = "c:\\temp\\";

  if ("" == strFileNameOnServer)
  {
    txtOutput.InnerHtml = "Error - a file name must be specified.";
    return;
  }

  if (null != uplTheFile.PostedFile)
  {
    try
    {
      uplTheFile.PostedFile.SaveAs(strBaseLocation+strFileNameOnServer);
      txtOutput.InnerHtml = "File <b>" +
        strBaseLocation+strFileNameOnServer+"</b> uploaded successfully";
    }
    catch (Exception e)
    {
      txtOutput.InnerHtml = "Error saving <b>" +
        strBaseLocation+strFileNameOnServer+"</b><br>"+ e.ToString();
    }
  }
}
</script>

<table>
<form enctype="multipart/form-data" runat="server">
<tr>
  <td>Select file:</td>
  <td><input id="uplTheFile" type=file runat="server"></td>
</tr>
<tr>
  <td>Name on server:</td>
  <td><input id="txtServername" type="text" runat="server"></td>
</tr>
<tr>
  <td colspan="2">
  <input type=button id="btnUploadTheFile" value="Upload"
                    OnServerClick="btnUploadTheFile_Click" runat="server">
  </td>
</tr>
</form>
</table>

<span id=txtOutput style="font: 8pt verdana;" runat="server" />

</body>
</html>
To begin with we just look at the form for sending the file to the server (and
setting the name it is to have on the server). As we send mixed data, the
enctype is set to In this form I don't use Web Controls in contrast to the article Generating Graphics on the Fly, but use HTML Controls, which is why it looks very familiar. However, you wouldn't find this under ASP:
<input type=button id="btnUploadTheFile" value="Upload"
     OnServerClick="btnUploadTheFile_Click" runat="server">
Clicking the button triggers an event at the server which is being handled in the function btnUploadTheFileFile_Click. And so we are now at the code necessary for successfully saving a file on the server:
  if (null != uplTheFile.PostedFile)
  {
    try
    {
      uplTheFile.PostedFile.SaveAs(strBaseLocation+strFileNameOnServer);
      txtOutput.InnerHtml = "File <b>" +
        strBaseLocation+strFileNameOnServer+"</b> uploaded successfully";
    }
    catch (Exception e)
    {
      txtOutput.InnerHtml = "Error saving <b>" +
        strBaseLocation+strFileNameOnServer+"</b><br>"+ e.ToString();
    }
  }
This isn't the exact source code from the example, but only the 'niceties' for file naming on the server are left out - the upload works the same here. Now what happened? The if test checks whether a file was posted by testing the PostedFile property against null. If a file is being uploaded, this property contains a vaild reference to an object of the type HttpPostedFile, and thus is not null. After this safety check, all that is left to do is 'merely' saving the file - a simple call of the function SaveAs on the object HttpPostedFile does everything for us. Should something go wrong, our code will be notified by means of an exception. It is this easy to load a file onto the webserver in ASP.NET. The example code itself differs from this only in that the file can have a name chosen by the user. This makes it a bit longer, but already quite flexible. There is nothing barring the reuse and extension in your own projects. Upload and direct Processing of the DataHowever nice and convenient the simple saving of the uploaded data into a file on the server may be, often you want to immediately continue working with the uploaded data (the bits) - without taking the detour through a file. Applications would be for example storing the data in a database, parsing the data or performing some other kind of processing. In this case too, ASP.NET and the .NET Framework do not leave us dangling. Instead of handing control over to the SaveAs function, one can gain immediate access to the stream of uploaded data and continue working with it - while the upload runs. The example I constructed for demonstration purposes currently only has one purpose: reading the uploaded data out of the stream, temporarily storing them in a string variable - just to then send them to the client. For text uploads this may already suffice, with binary uploads (e.g. images) output is not exactly overwhelming: 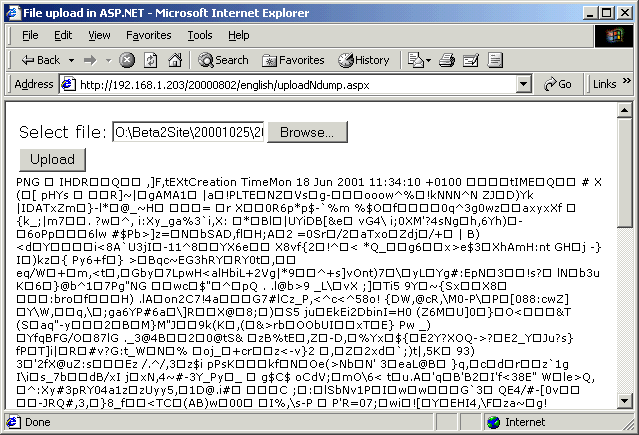
The above screenshot shows that my source code (uploadNdump.aspx) also can correctly handle binary data. I achieve this through a forced conversion to ASCII. The details for this can be found in the source code and the following description.
<% @Page Language="C#" %>
<% @Import Namespace="System.IO" %>
<% @Import Namespace="System.Text" %>
<html>
<head>
  <title>File upload in ASP.NET</title>
</head>
<body bgcolor="#ffffff" style="font:8pt verdana;">
<script language="C#" runat="server">
void btnUploadTheFile_Click(object Source, EventArgs evArgs)
{
  if (null != uplTheFile.PostedFile)
  {
    try
    {
      const int BUFFER_SIZE = 255;
      int nBytesRead = 0;
      Byte[] Buffer = new Byte[BUFFER_SIZE];
      StringBuilder strUploadedContent = new StringBuilder("");

      Stream theStream = uplTheFile.PostedFile.InputStream;
      nBytesRead = theStream.Read(Buffer, 0, BUFFER_SIZE);

      while (0 != nBytesRead)
      {
        strUploadedContent.Append(Encoding.ASCII.GetString(Buffer,0,nBytesRead));
        nBytesRead = theStream.Read(Buffer,0,BUFFER_SIZE);
      }

      txtOutput.InnerHtml = Server.HtmlEncode(strUploadedContent.ToString());
    }
    catch (Exception e)
    {
      txtOutput.InnerHtml = "Error saving <b>" +
        uplTheFile.PostedFile.FileName + "</b><br>"+ e.ToString();
    }
  }
}
</script>

<table>
<form enctype="multipart/form-data" runat="server">
<tr>
  <td>Select file:</td>
  <td><input id="uplTheFile" type=file runat="server"></td>
</tr>
<tr>
  <td colspan="2">
  <input type=button id="btnUploadTheFile" value="Upload"
                    OnServerClick="btnUploadTheFile_Click" runat="server">
  </td>
</tr>
</form>
</table>

<span id=txtOutput style="font: 8pt verdana;" runat="server" />

</body>
</html>
The form part of the script already is known from the previous listing, only the field for naming the on the server is missing - it is no longer needed. What now are the changes in the code for the upload itself? Basically it is just this part:
const int BUFFER_SIZE = 255;
int nBytesRead = 0;
Byte[] Buffer = new Byte[BUFFER_SIZE];
StringBuilder strUploadedContent = new StringBuilder("");

Stream theStream = uplTheFile.PostedFile.InputStream;
nBytesRead = theStream.Read(Buffer, 0, BUFFER_SIZE);

while (0 != nBytesRead)
{
  strUploadedContent.Append(
          Encoding.ASCII.GetString(Buffer,0,nBytesRead));
  nBytesRead = theStream.Read(Buffer,0,BUFFER_SIZE);
}
First I define a constant and then instantiate three variables needed for the processing of the stream data: a variable containing the number of bytes read, the buffer for the data read and the StringBuilder which is being used for saving the stream data which have been converted to ASCII. Now the action begins - first I fetch a reference to the Stream which is made available by the object HttpPostedFile (which in turn is available through the PostedFile property of the HtmlInputFile object). This way I avoid additional accesses to properties and foreign objects which would only add to the processing time. Then I read in the initial data and enter the while loop. There the data is converted to ASCII and the next data is read. The while loop breaks when no more data has arrived at the server. When the while loop is done, I have the data at my disposal as a string for further processing - instead of writing it back to the client I might as well parse the string - or write it to a database. The intended application dictates the further processing. By the way: if you want to use the unmodified binary data, you should avoid the conversion to ASCII and use the appropriate 'intermediate storage' - a large byte array, a MemoryStream or a self defined data structure. ConclusionIn this article I have presented two different methods for file uploads: the SaveAs Method, as well as the direct reading of the data with the help of the Stream object. The latter method will be used when you want to directly work with the file data without beforehand going through the detour of saving to a physical file on the server. Downloading the CodeClick here to start the download.
©2000-2004 AspHeute.com |